
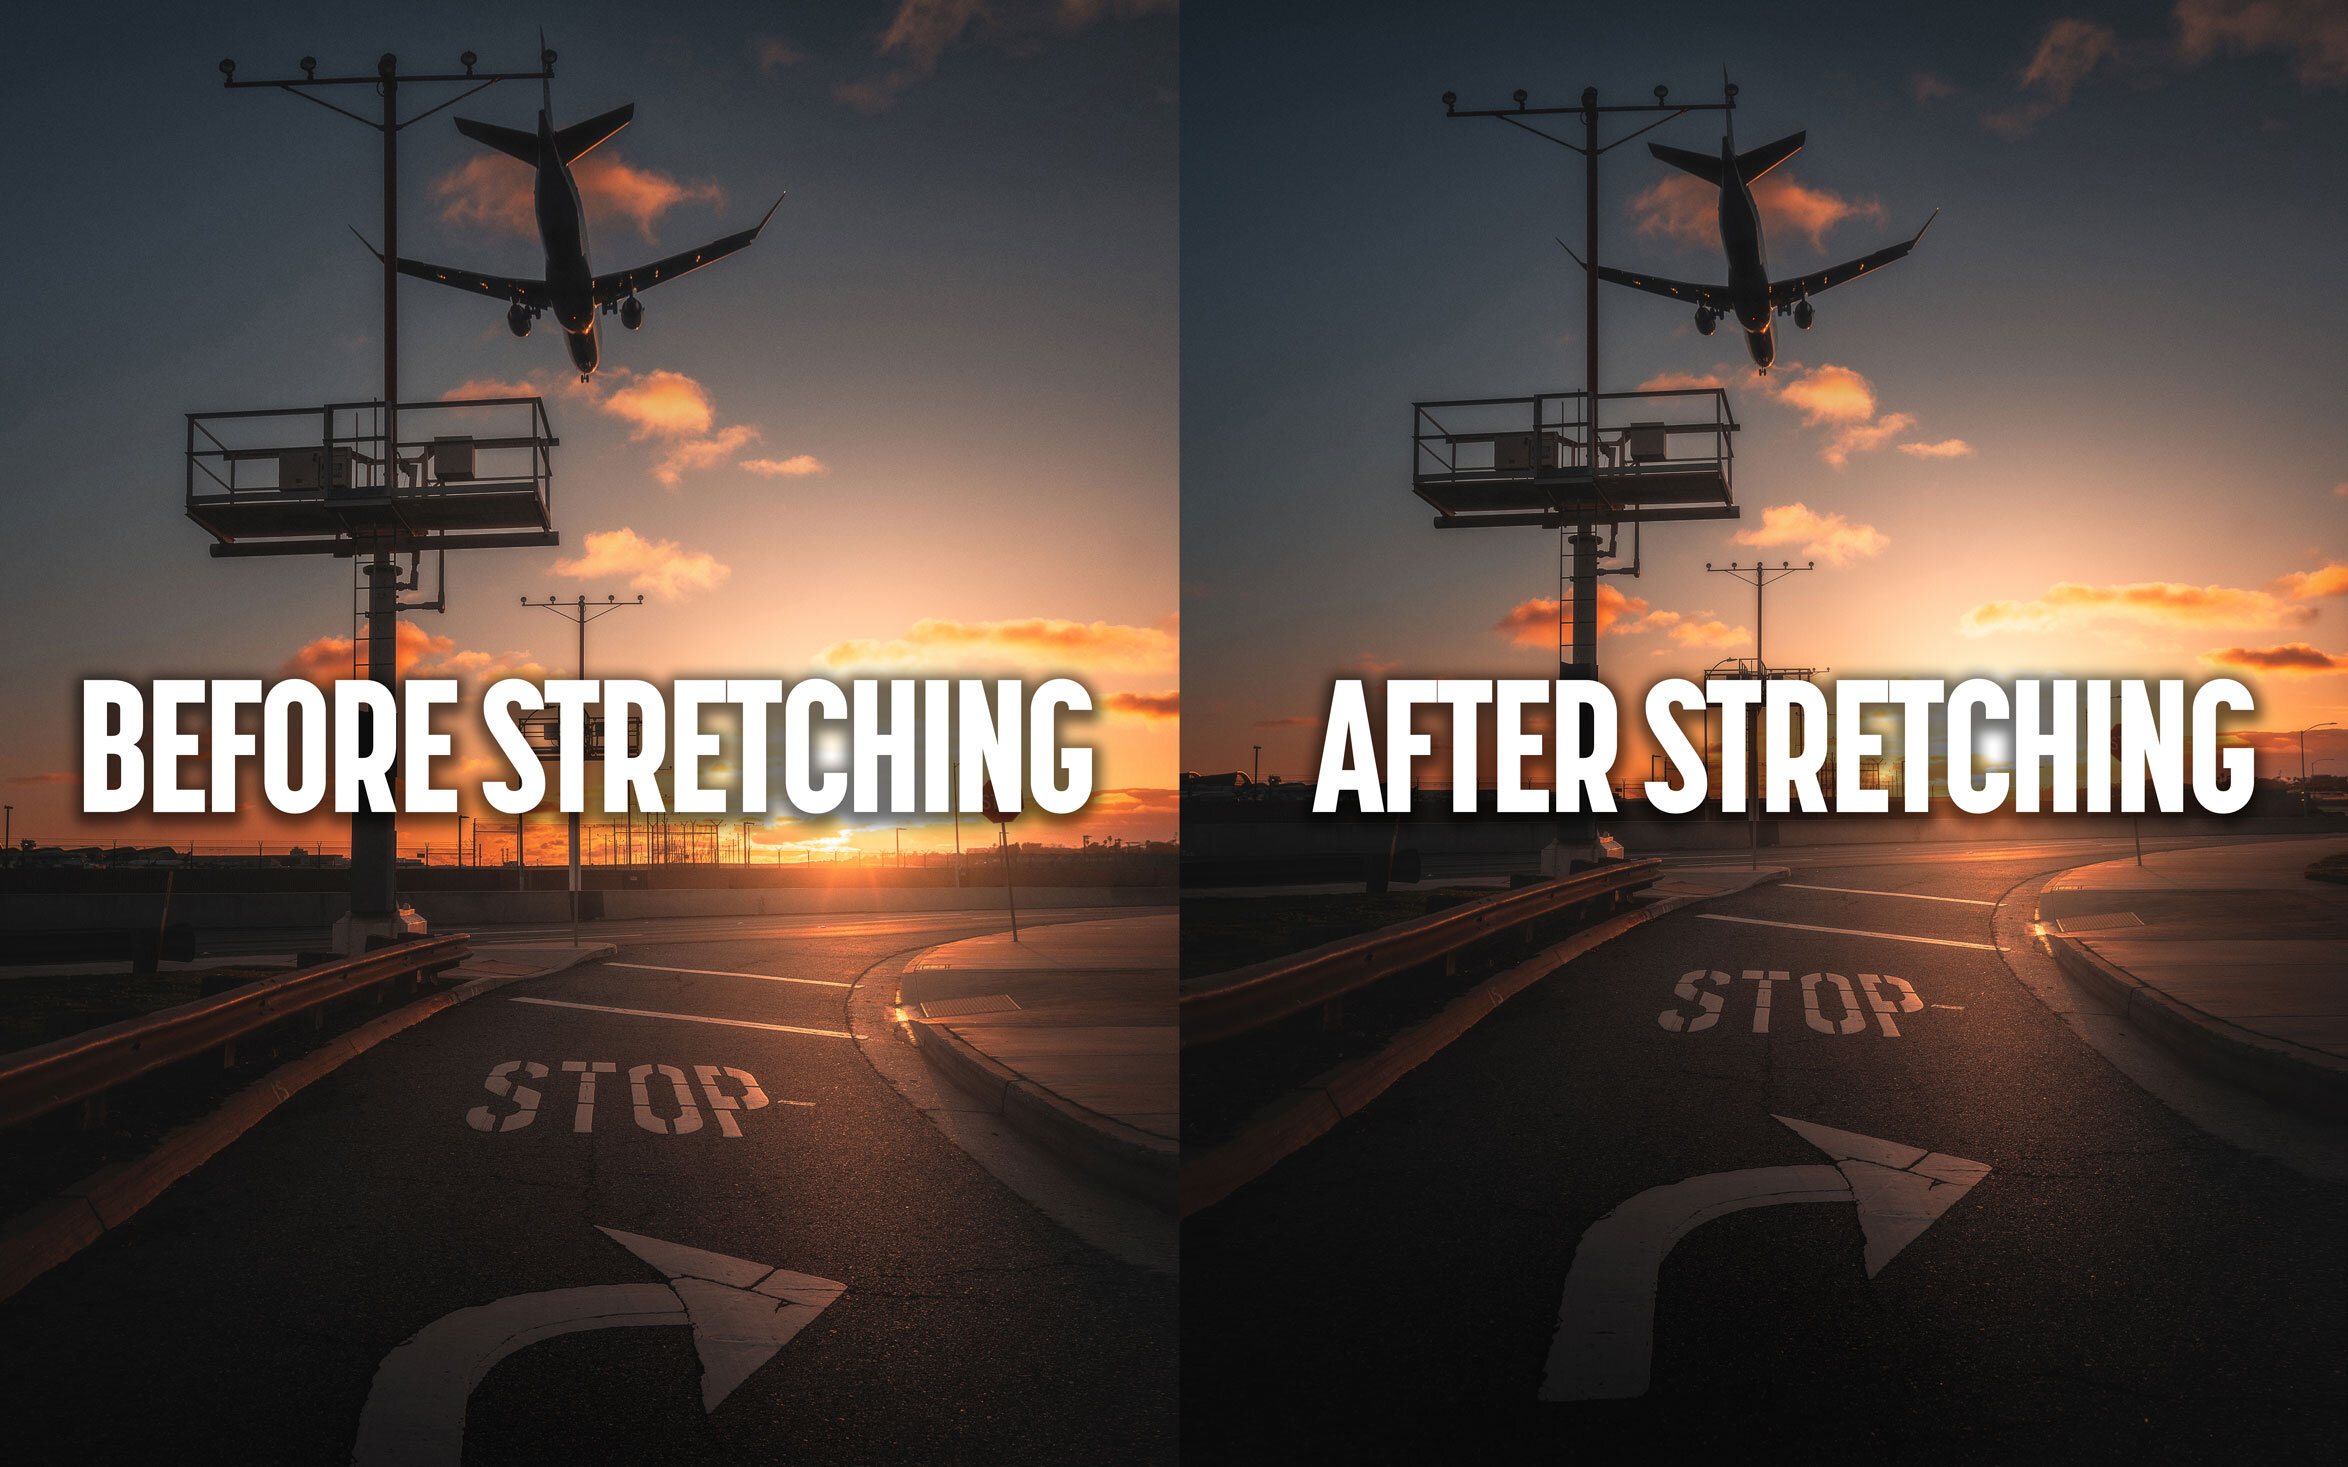
How to Stretch Images Without Distortion
The dreaded 4x5 crop. Whether you shot vertical instead of horizontal, or your image just needs a little breathing room, there are times when you can’t fit everything you want in frame. In this quick article, i’ll teach you an easy way to stretch your images to fit Instagram’s crop without any distortion. If you are a visual learner, i’ve also included a short video at the bottom of the article that walks through the entire process.
Step 1: Expand The Canvas
Bring your image into photoshop, and make sure to Rasterize the smart object if your layer is one. Next, choose Image > Canvas Size and change the width to 120%. This will give you a canvas size with Instagam’s 4x5 ratio (at least it does for me with RAW files from the Sony A7RIII).
Step 2: Stretch Using Content Aware Scale
Grab the rectangular marquee tool to select one side of the image. Start from one of the corners and drag inwards. Once you have your selection made, choose Edit > Content Aware Scale. Next, hold shift and drag out to fill the canvas with your selection. Remove your selection by pressing Ctrl-D on a Windows keyboard or Cmd-D on a Mac, and then repeat the process on the opposite side.
Step 3: Clean Up
At this point, you may be all good to go! But if you have any lines at the edge of your photo that weren’t perfectly vertical or horizontal, chances are you’ll need to grab the clone stamp tool to clean up any curves that may have occurred. This is an important step to hide any distortions on the edges of the image.
Step 4: Share With the World
Your new photo now fits perfectly in frame and is ready to share with the world! Let me know if you found this tutorial helpful! If you use this technique in any of your photos, please tag me on Instagram (@andrewoptics) so that I can see.
Thanks for reading!
