
How to Install Lightroom Mobile Presets Without Desktop
This tutorial will teach you how to install Lightroom Mobile presets into the free Adobe Lightroom Mobile app, without a desktop or the need to sync across Lightroom CC.
If you already have the desktop version of Lightroom (the subscription based Classic or CC), you can simply load your presets into Lightroom CC and they will sync over to mobile. In this article, we will be looking at how to install Lightroom presets without needing an Adobe Creative Cloud subscription.

Step 1: Unzip the files
The first thing you will need to do, is unzip the folder of presets that you downloaded. While this can easily be done on a computer by either double clicking the folder (Mac) or right-clicking and choosing “Extract All” (PC), you can also complete this step directly on your mobile phone.
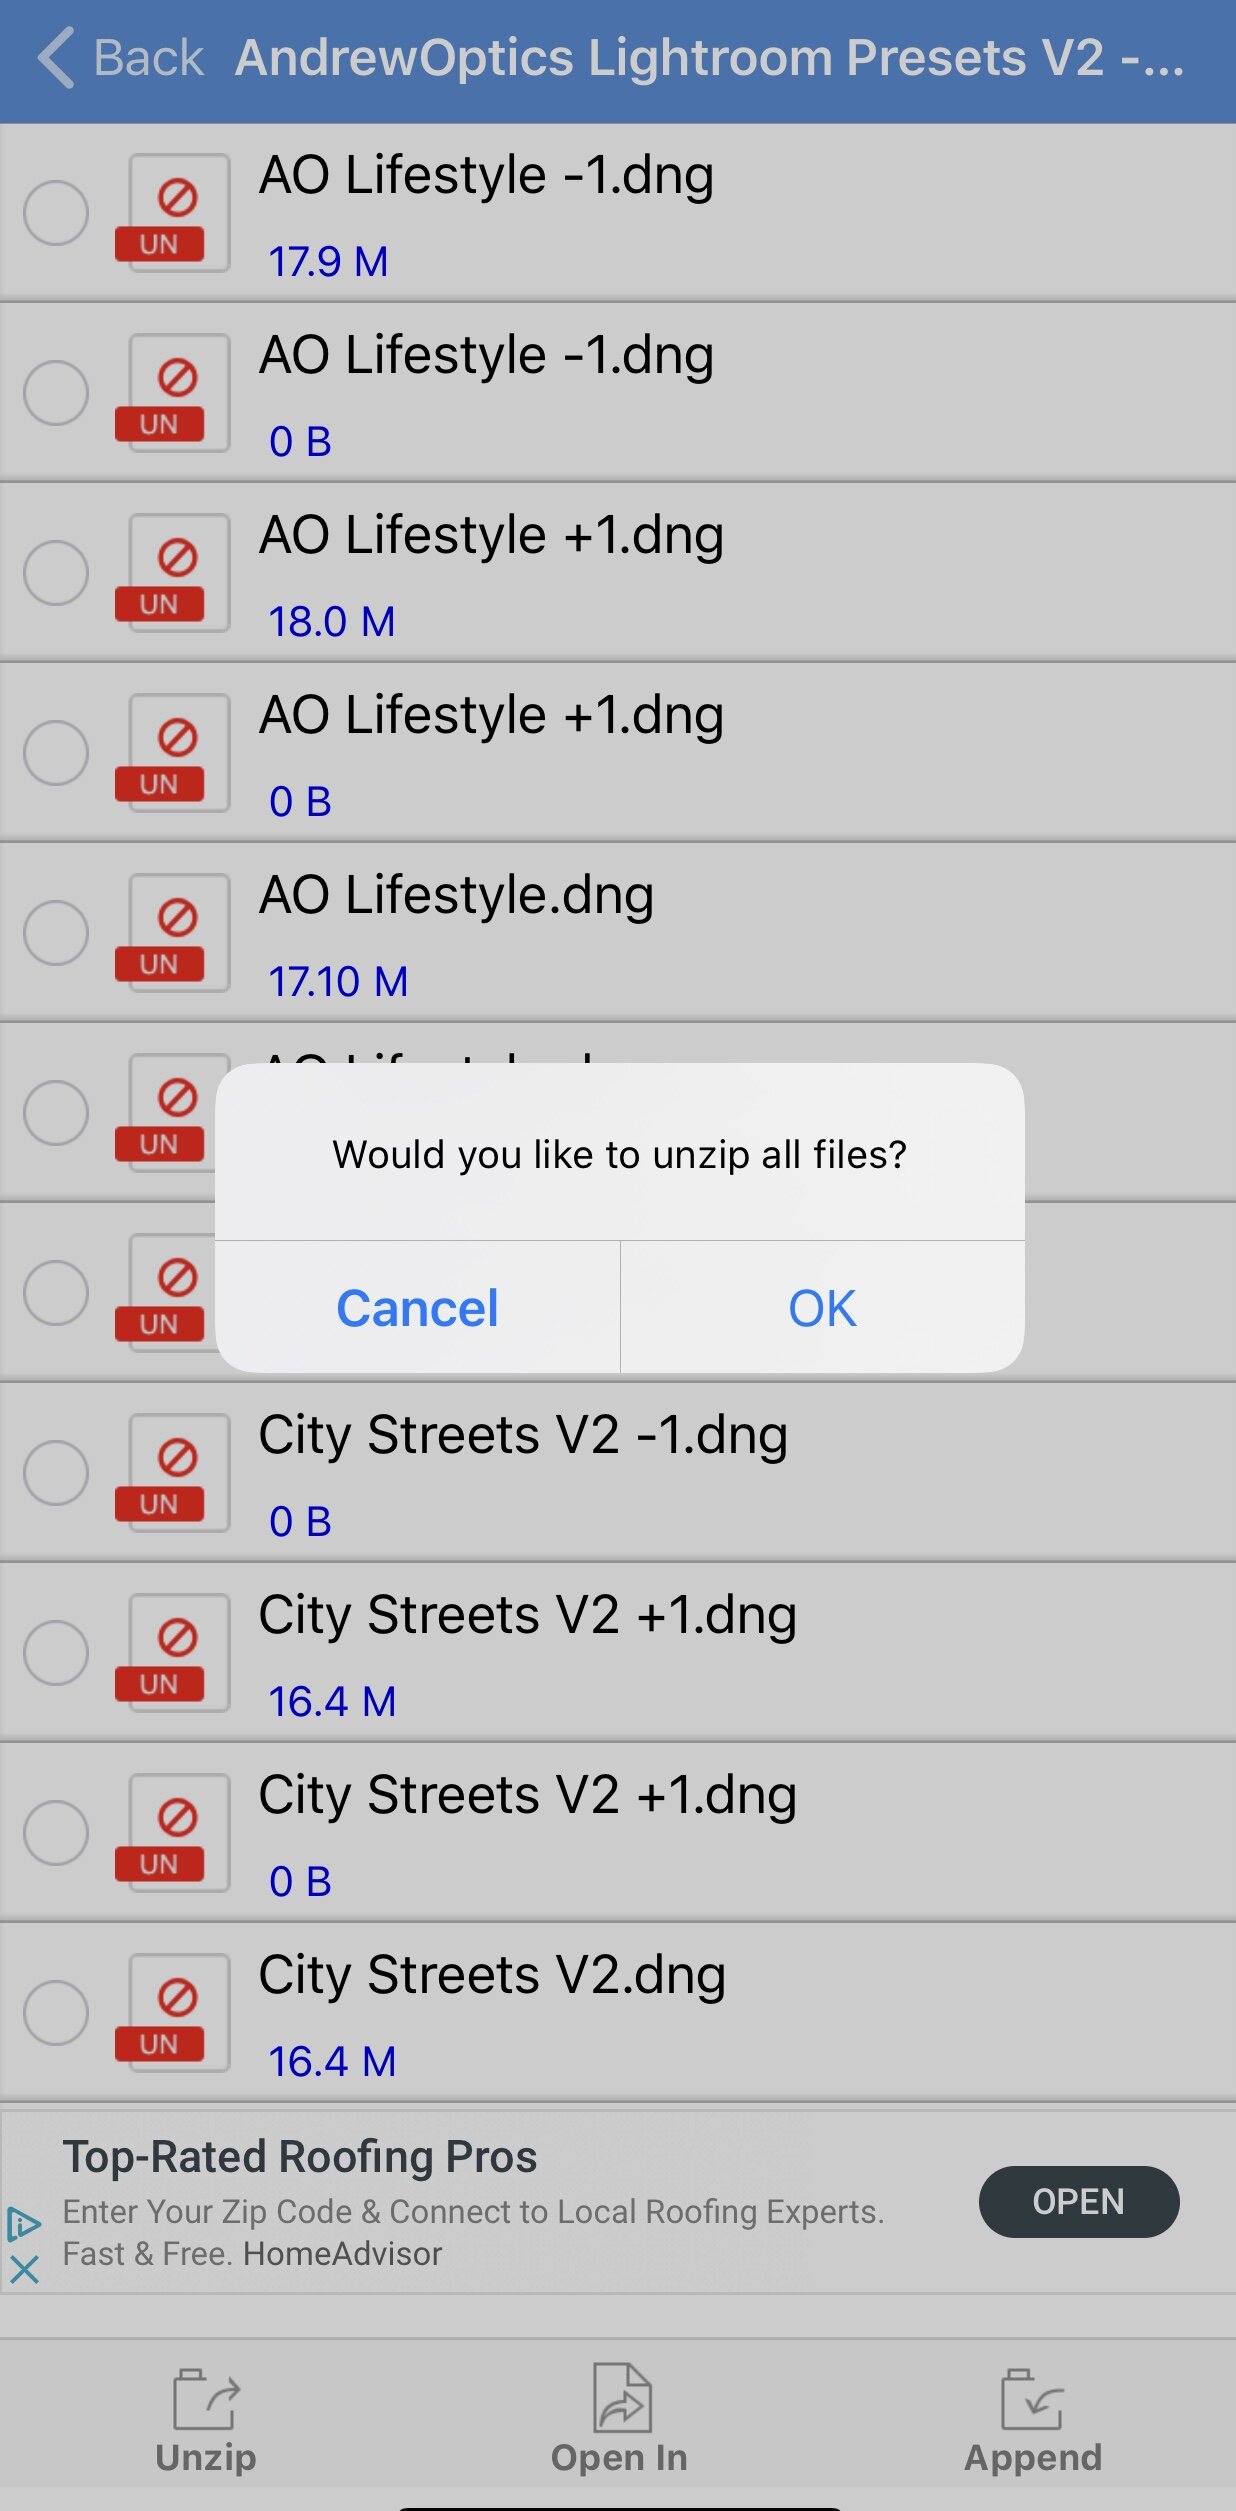
To unzip the files on your phone, you’ll need to download an unzip mobile app such as iZip (iOS or Android). Click the folder, open in iZip, and choose to unzip all files.
Step 2: Save the Presets
If you used a computer to unzip the presets, you have two options on how to save the DNG files onto your phone.
Option 1 – Airdrop
You can simply select all of the DNG files within the folder, and airdrop them directly into your iPhone’s camera roll. Please note: this option only works from Mac to iPhone.
Option 2 – Cloud Storage
If airdrop is not an option, you can use your cloud storage solution of choice (Dropbox, Google Drive, etc.). Just make sure that you also have access to whichever program you choose on your phone. I’ll be using Dropbox. Create an “AndrewOptics Lightroom Presets V2” folder in Dropbox. Drag and drop your DNG files into your Dropbox folder, and wait for them to sync.
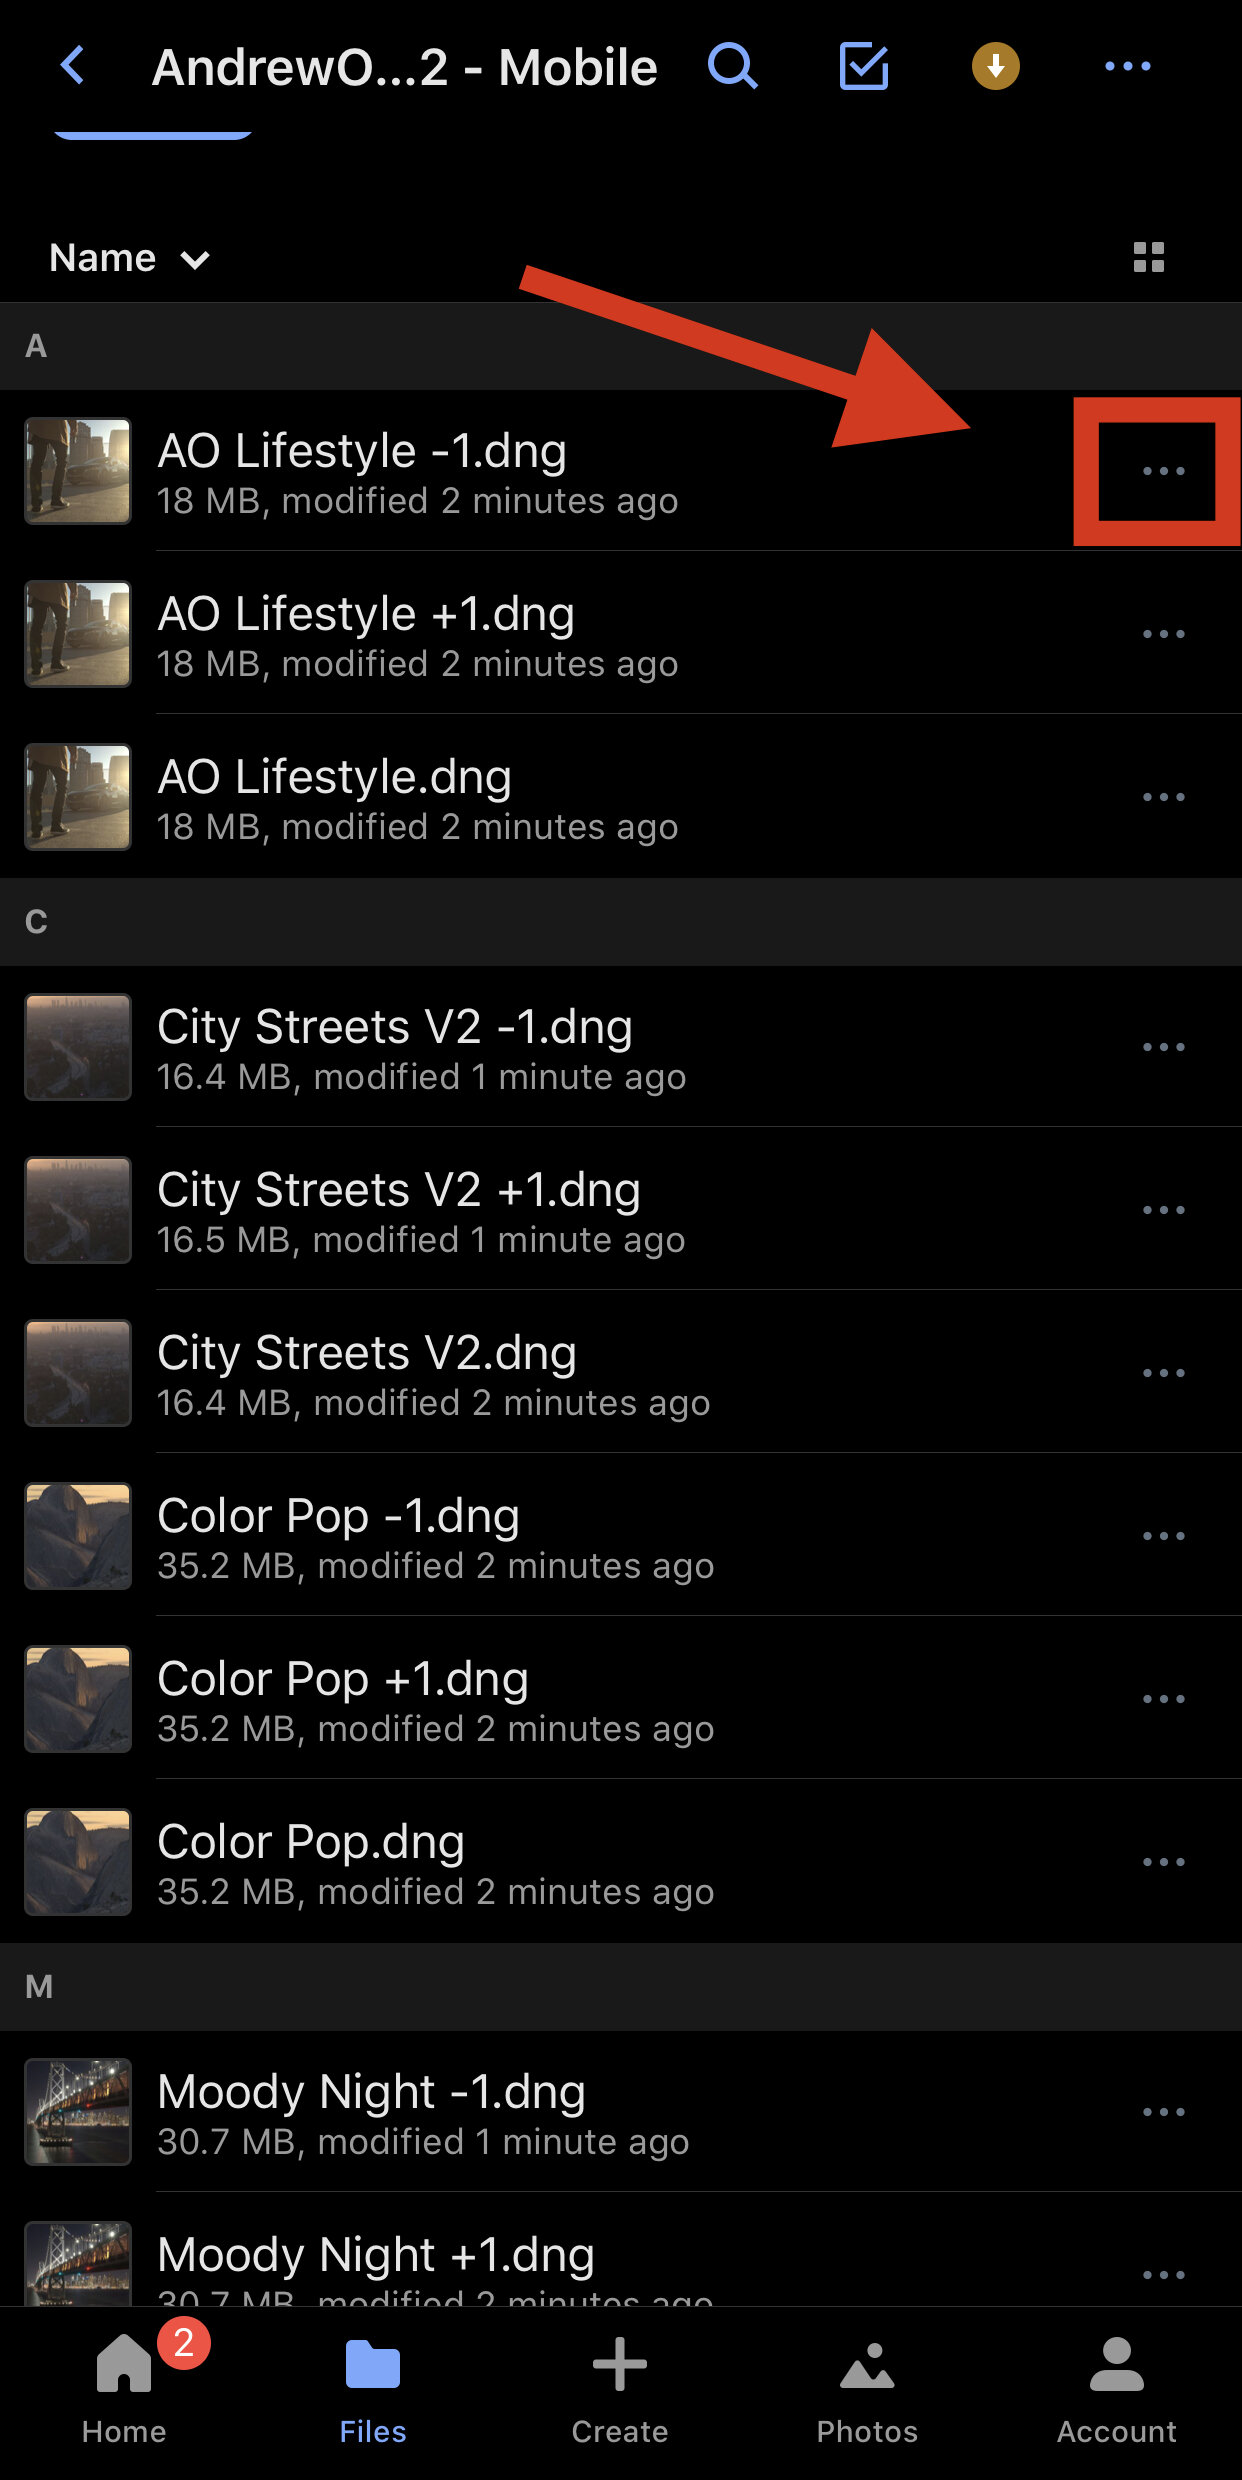
Open the Dropbox app on your phone and tap the 3 dots button next to each DNG file:
Then tap Export:

Then tap on Save Image:

Option 3
If you unzipped the folder using iZip, you just want to make sure you have access to all of the DNG files within the app.
Once you have all of the unzipped, DNG files on your phone (either in your camera roll or in iZip) you are ready to move to the next step.
Step 3: Import Preset Files into Lightroom Mobile
The DNG files act as carriers for the presets themselves. Now that you have all of the DNG files on your phone, the last thing to do is load them into Lightroom Mobile and create save the settings as presets.
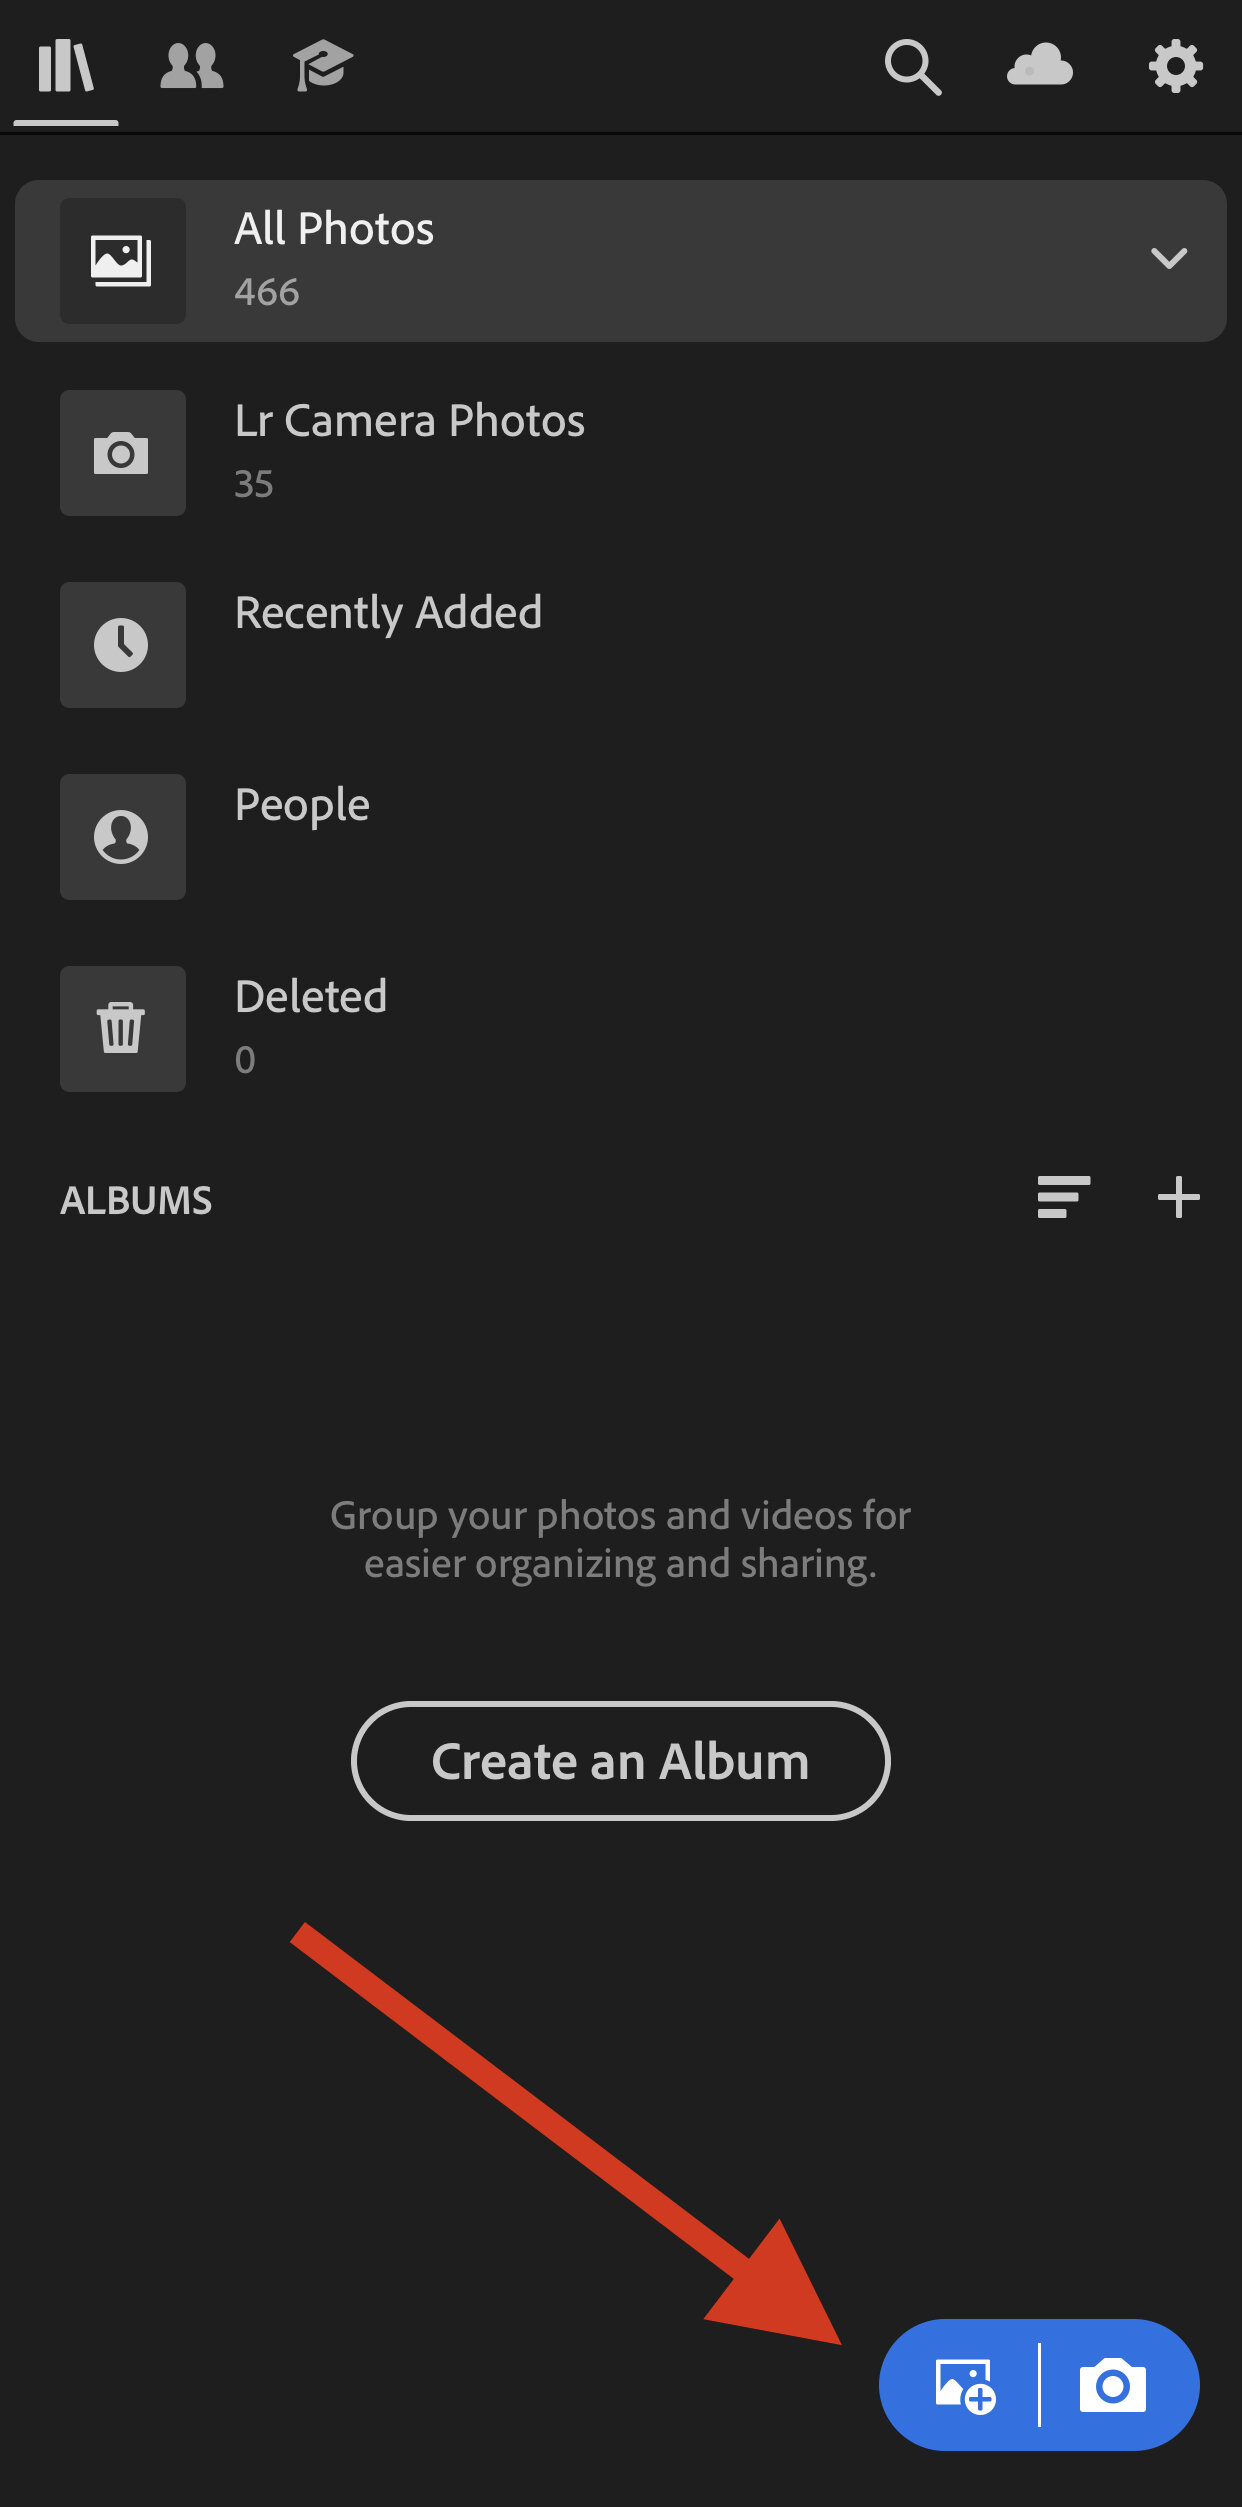
Open Lightroom Mobile on your phone. Click the Add Photos button in the bottom right corner:
Tap “From Camera Roll” if you used option 1 or 2 in the step above, or tap “From Files” if you used option 3.


To load in all of the DNG files into Lightroom Mobile, follow the screenshots on the left if you used iZip and follow the screenshots on the right if you used Airdrop or Dropbox.
Find the iZip folder and select it.

Select all files and tap “Open”.

Click the 3 dots button.

Check “Select Mode”.
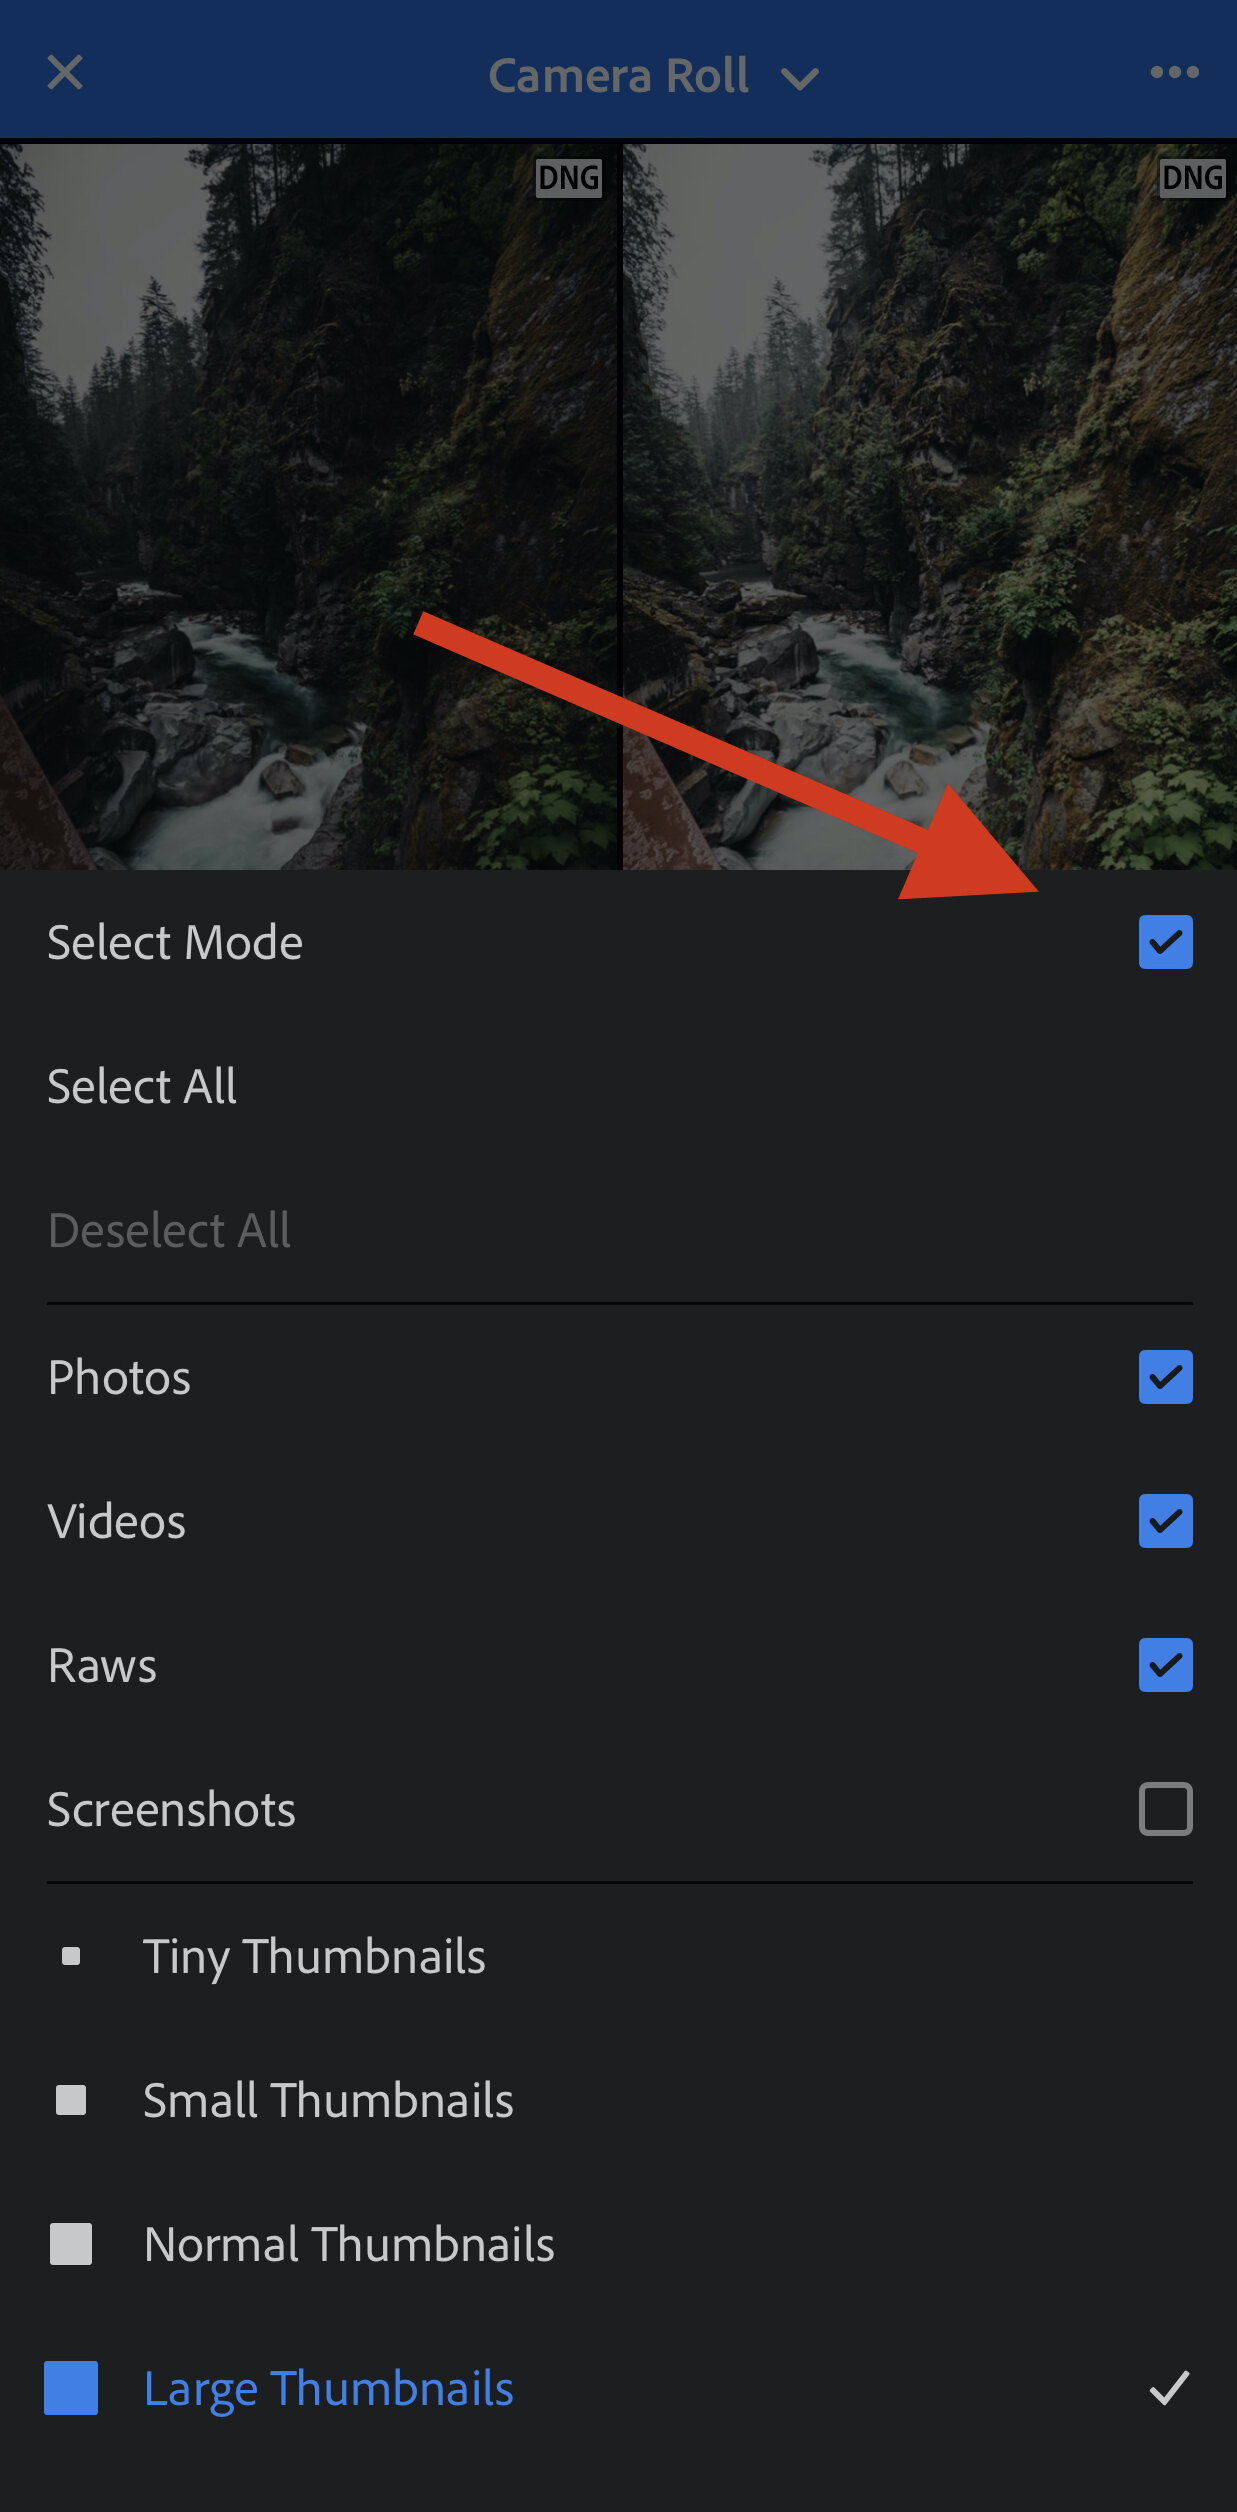
Select all files and click “Add”.

Step 4: Save Settings as Presets
At this point, you should have all of the DNG files loaded into your Lightroom Mobile app. Simply locate one of the DNG files in your Lightroom Mobile library (they should all appear under “Recently Added”) and open it. Next, click the 3 dots button in the top right corner:

Tape the “Create Preset” button.

Make sure that all of the boxes below are checked, excluding Optics and Geometry. Under Preset Name, type in a name that describes the preset. For my presets, you can follow the naming as shown here. Under Preset Group, you can create a folder that all of the presets will live in. For mine, I named the folder “AndrewOptics V2”.

Finally, click the check mark at the top right part of the screen to finish creating the preset. Repeat the same steps for each DNG/preset file.
Step 5: Using Your Lightroom Mobile Presets
To use your new presets, just go back into your library and open any photo you’d like to edit. Scroll to the Presets icon in the menu at the bottom of the screen, tap it, and then select whichever preset you’d like to apply. Pro Tip: Once applied, I always make adjustments to my images. Doing so will allow you to make each photo your own masterpiece.
That’s it, thanks for reading! Now you know how to import and use Lightroom presets with the free version of Lightroom Mobile. If you haven’t checked it out already, I have a new Lightroom Preset pack that works on all versions of Lightroom as well as Lightroom Mobile. My pack works great on all types of images, but really stands out on landscapes, cityscapes, street, and lifestyle photography. You can find the preset pack here: www.andrewoptics.com/presets
My friends at Pixpa have also curated a list of various types of professional Lightroom presets like black and white presets, portraits presets, wedding presets, and much more. You can check out a list here.